Make This Adorable Desk Organizer in 4 Easy Steps


Spring has sprung and traditionally, this is the time for us to go through winter’s clutter and start the new season with a fresh, clean slate. Like most people who spend their days at a desk, my desk has the tendency to become a dumping ground for anything from bills and stationary to random products and magazines. But staring at such chaos every day is not conducive to a clear mind, so I’ve decided to start right there and sort out my workspace with the adorable desk organizer.

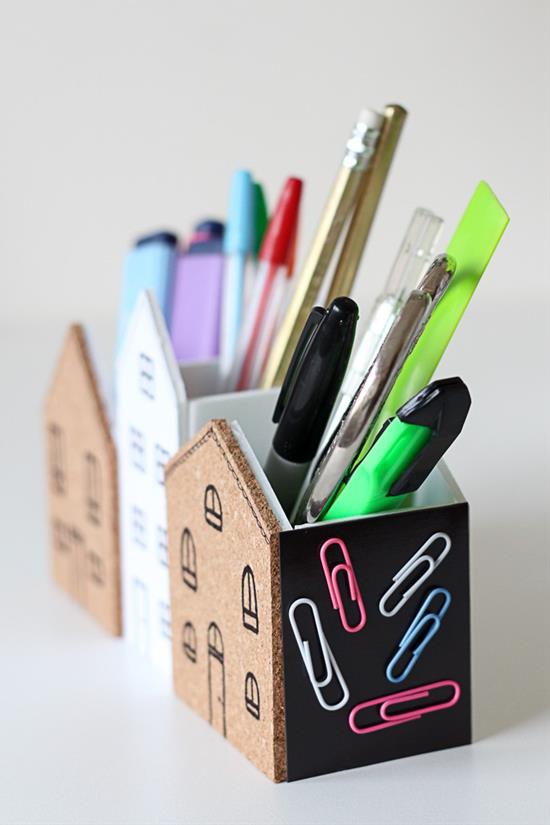
This very handy organizer has 3 sections to keep all your knick-knacks and miniature cork boards on the front which you can pin reminders to – goodness knows we all have an awful lot to remember! The handy magnetic piece is great for keeping paperclips together.

You will need:
- 3/16” Foam board (2xA4 or 1xA3)
- Clear adhesive glue
- Craft knife
- Ruler
- Thin permanent marker
- 4-5mm thick cork (optional)
- Adhesive magnet sheet (optional)
Instructions:
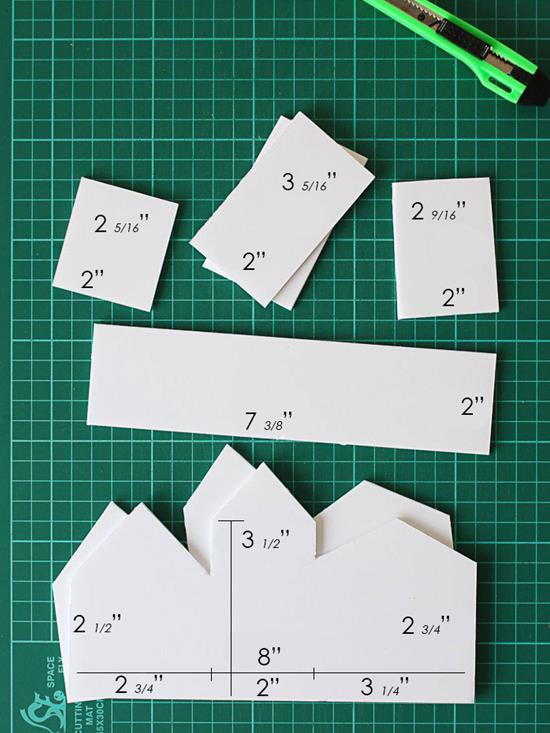
Step 1: Cut all the pieces from foam board as shown, using a fine craft knife. Scissors have the tendency to compress the foam and make the edges difficult to glue.
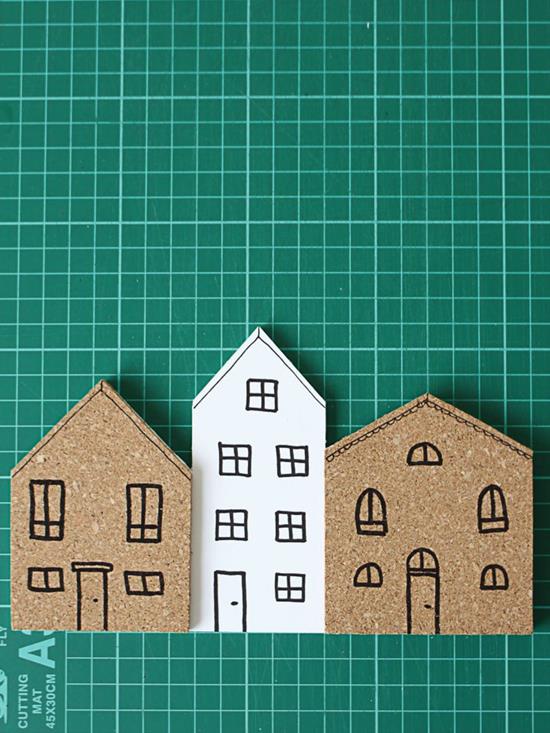
Step 2: Cut the cork shapes to cover the 2 outer houses, and add details to the cork using a marker. Then glue the cork to the corresponding foam piece.
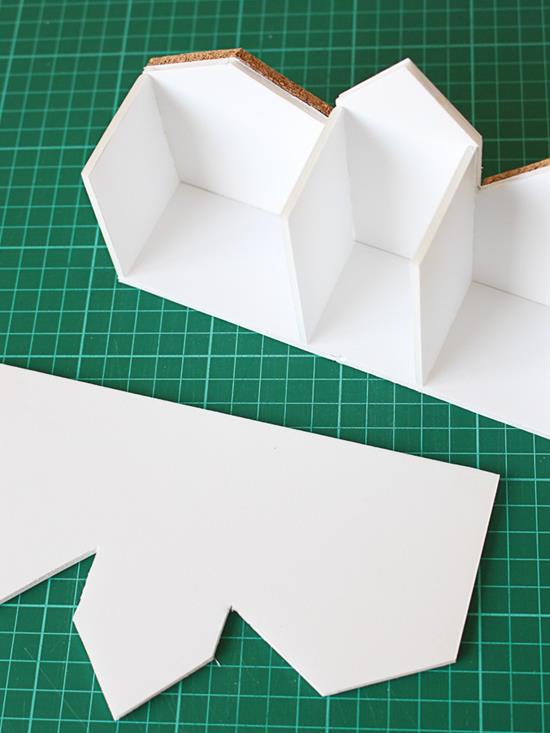
Step 3: Now you are going to assemble the houses. Start by gluing the bottom of the row of houses to the long base piece. Make sure that you glue the houses to the side of the base, so that the base won’t be visible from the front. Then add the interior divider pieces, and allow to dry thoroughly before you add the back piece.
Step 4: Next, cut a small piece of adhesive magnetic sheet to fit the side of one or both ends and glue that in place.
Now that your desk is organized, it’s time to start sorting out the rest of your home. Enjoy!